
Nothing says celebration quite like soft, buttery cookies filled with creamy cheesecake goodness. These Red Velvet Cream Cheese Thumbprint Cookies are the perfect festive treat for holidays, birthdays, or even just a cozy afternoon at home. With their vibrant red hue, tender crumb, and luscious cream cheese filling, they’re both visually stunning and irresistibly delicious.
Whether you’re baking for Christmas, Valentine’s Day, or a special occasion, these cookies are a guaranteed crowd-pleaser. The combination of rich cocoa, a hint of vanilla, and smooth cream cheese filling elevates them from ordinary to extraordinary. Plus, they’re easy enough for home bakers of all skill levels.
Why You’ll Love These Cookies
- Festive and eye-catching: The bright red color instantly makes them holiday-ready.
- Soft and tender texture: Buttery cookie base with a delicate crumb.
- Creamy filling: Sweetened cream cheese in the center adds a luxurious contrast.
- Easy to make: Simple ingredients and straightforward steps for home bakers.
- Versatile: Perfect for holiday parties, gift-giving, or dessert tables.
- Freezable: Can be stored in the freezer for up to 2 months.
Ingredients Breakdown
This recipe makes 24 cookies, combining a rich red velvet dough with creamy cheesecake filling.
Cookie Dough
- 1 cup butter, softened
- ½ cup brown sugar, packed
- 1 large egg yolk
- 1 teaspoon vanilla extract
- 2 cups all-purpose flour
- 4 teaspoons red food coloring (gel recommended)
- 2 teaspoons cocoa powder
- ½ cup granulated sugar or sanding sugar (for rolling)
Cream Cheese Filling
- 4 ounces cream cheese, softened
- 1 large egg yolk
- ¼ cup granulated sugar
- ⅛ teaspoon salt
- ¼ teaspoon vanilla extract
Tools & Equipment Needed
- Mixing bowls (large and medium)
- Hand mixer or stand mixer
- Measuring cups and spoons
- Baking sheets
- Parchment paper or silicone baking mats
- Spatula
- Thumb or back of a spoon (for making indentations)
- Wire cooling rack
Step-by-Step Instructions
Follow these steps to create perfectly soft and creamy thumbprint cookies every time.
1. Prepare the Oven and Baking Sheets
Preheat the oven to 350°F (175°C). Line two baking sheets with parchment paper or silicone baking mats to prevent sticking.
2. Make the Cookie Dough
- In a large bowl, cream together the softened butter and brown sugar until light and fluffy.
- Add the egg yolk and vanilla extract, mixing until fully incorporated.
- In a separate bowl, whisk all-purpose flour and cocoa powder. Gradually add the dry mixture to the wet ingredients, stirring until a cohesive dough forms.
- Add the red food coloring and mix thoroughly for a uniform red color.
Tip: Use gel food coloring for a vibrant red without adding extra liquid to the dough.
3. Shape the Cookies
- Roll dough into 1-inch balls.
- Coat each ball in granulated sugar or sanding sugar for a slight crunch.
- Place balls on prepared baking sheets, spacing them 2 inches apart.
- Press a small indentation into the center of each ball using your thumb or the back of a spoon.
4. Prepare the Cream Cheese Filling
- In a medium bowl, beat softened cream cheese, egg yolk, sugar, salt, and vanilla extract until smooth and creamy.
- Spoon a small amount of the cream cheese mixture into each cookie indentation, filling nearly to the top.
5. Bake
Bake in the preheated oven for 12–14 minutes. Edges should be set, and the cream cheese filling should appear slightly puffed but not browned. Avoid overbaking to keep cookies soft.
6. Cool and Serve
- Allow cookies to cool on the baking sheet for a few minutes before transferring to a wire rack.
- Serve fresh, or store in an airtight container in the refrigerator for up to 5 days.
Tips & Variations
- Chilling the Dough: If dough feels too soft to handle, refrigerate for 10–15 minutes before rolling.
- Extra Red Color: Gel food coloring provides the most vibrant hue without affecting dough consistency.
- Flavor Variations: Add a teaspoon of orange or almond extract to the cream cheese filling for a unique twist.
- Toppings: Sprinkle crushed candy canes, chocolate chips, or chopped nuts over the filling before baking for added texture.
- Make-Ahead: Dough can be prepared and refrigerated for a few hours before baking. Cookies freeze beautifully for up to 2 months.
Flavor Profile & Pairings
- Taste: Buttery, subtly chocolatey, sweet with creamy tang from the cheesecake center.
- Texture: Soft cookie with tender crumb and smooth, velvety filling.
- Pairings: Perfect with a cup of coffee, hot cocoa, or festive tea. Also pairs beautifully with other holiday treats for a dessert platter.
Nutritional Overview (Per Cookie)
| Nutrient | Amount |
|---|---|
| Calories | 150 kcal |
| Protein | 2 g |
| Carbohydrates | 18 g |
| Fat | 8 g |
| Saturated Fat | 5 g |
| Fiber | 0.5 g |
| Sugar | 10 g |
| Sodium | 50 mg |
| Cholesterol | 25 mg |
Dietary Notes: These cookies are suitable for vegetarians. For lower sugar, reduce sugar in filling slightly or use sugar substitutes.
Make-Ahead & Storage Tips
- Dough: Can be chilled for 10–15 minutes before shaping, or stored in the fridge for up to 24 hours.
- Cookies: Store in an airtight container in the refrigerator for up to 5 days.
- Freezing: Freeze baked cookies for up to 2 months. Thaw at room temperature before serving.
- Reheating: Microwave for 10–15 seconds to soften cream cheese slightly if desired.
Frequently Asked Questions
1. Can I use regular red food coloring?
Yes, but gel coloring is preferred for a vibrant, rich hue without altering dough consistency.
2. Can I make these cookies gluten-free?
Substitute all-purpose flour with a 1-to-1 gluten-free flour blend. Check baking time as it may vary slightly.
3. Can the cream cheese filling be made ahead?
Yes, prepare filling in advance and store in the refrigerator until ready to assemble.
4. Can I make smaller or larger cookies?
Yes, adjust baking time accordingly. Smaller cookies may need 10–12 minutes, larger ones 15–16 minutes.
5. Are these cookies freezer-friendly?
Absolutely. Freeze for up to 2 months and thaw at room temperature before serving.
Cooking Timeline (At a Glance)
| Step | Time |
|---|---|
| Prep dough | 15–20 min |
| Chill dough (optional) | 10–15 min |
| Shape and fill cookies | 10 min |
| Bake | 12–14 min |
| Cool | 5–10 min |
| Total | ~35 min |
Serving Suggestions
- Arrange cookies on a festive platter for holiday parties.
- Sprinkle powdered sugar or edible glitter for extra visual appeal.
- Serve alongside mini cheesecakes, chocolate truffles, or other themed treats for dessert tables.
- Great for gift-giving—place in decorative tins or boxes.
Recipe Variations
- Chocolate Chip Red Velvet Thumbprints: Add mini chocolate chips to the cookie dough for extra chocolatey bites.
- Berry Cream Cheese Filling: Mix a teaspoon of raspberry or strawberry puree into the cream cheese.
- Nutty Twist: Sprinkle finely chopped pecans or walnuts over the filling before baking.
- Spiced Variation: Add a pinch of cinnamon or nutmeg to the dough for warmth and depth.
Ingredient Spotlight
Red Food Coloring
- Gel food coloring is ideal for vibrant color without adding extra liquid.
- Adjust intensity by adding more or less to the dough.
Cream Cheese
- Softened cream cheese creates a smooth, creamy filling that contrasts with the tender cookie.
- Full-fat cream cheese yields the richest flavor, but lower-fat options work too.
Cocoa Powder
- Adds subtle chocolate flavor to complement the red velvet taste.
- Use unsweetened cocoa for a balanced sweetness.
Pro Baking Tips
- Even dough balls: Use a cookie scoop for uniform size and consistent baking.
- Indentation technique: Make a deep enough well for the cream cheese, but avoid pushing all the way through.
- Avoid overbaking: Cookies should be slightly soft in the center when removed from the oven; they firm up as they cool.
- Room temperature ingredients: Ensure butter and cream cheese are soft for smoother dough and filling.
Storage & Freezing Guide
- Refrigerator: Store in an airtight container for up to 5 days.
- Freezer: Freeze baked cookies in layers with parchment paper for up to 2 months.
- Thawing: Bring to room temperature or warm slightly in the microwave before serving.
- Make-ahead filling: Keep cream cheese filling in the fridge and assemble just before baking for fresh taste.
Nutrition Estimate Table (Per Cookie)
| Nutrient | Amount |
|---|---|
| Calories | 150 kcal |
| Protein | 2 g |
| Carbohydrates | 18 g |
| Fat | 8 g |
| Saturated Fat | 5 g |
| Fiber | 0.5 g |
| Sugar | 10 g |
| Sodium | 50 mg |
| Cholesterol | 25 mg |
Expanded Conclusion
These Red Velvet Cream Cheese Thumbprint Cookies are more than just a sweet treat—they’re a festive experience. The combination of tender red velvet dough and rich cream cheese filling creates a dessert that is both visually stunning and utterly indulgent. Perfect for holidays, celebrations, or even as a special everyday treat, they’re easy to make and sure to impress.
With vibrant color, creamy filling, and buttery texture, this cookie recipe is destined to become a go-to festive favorite in your kitchen. Try making a batch for your next gathering or holiday party—you’ll be greeted with smiles and requests for seconds!
Print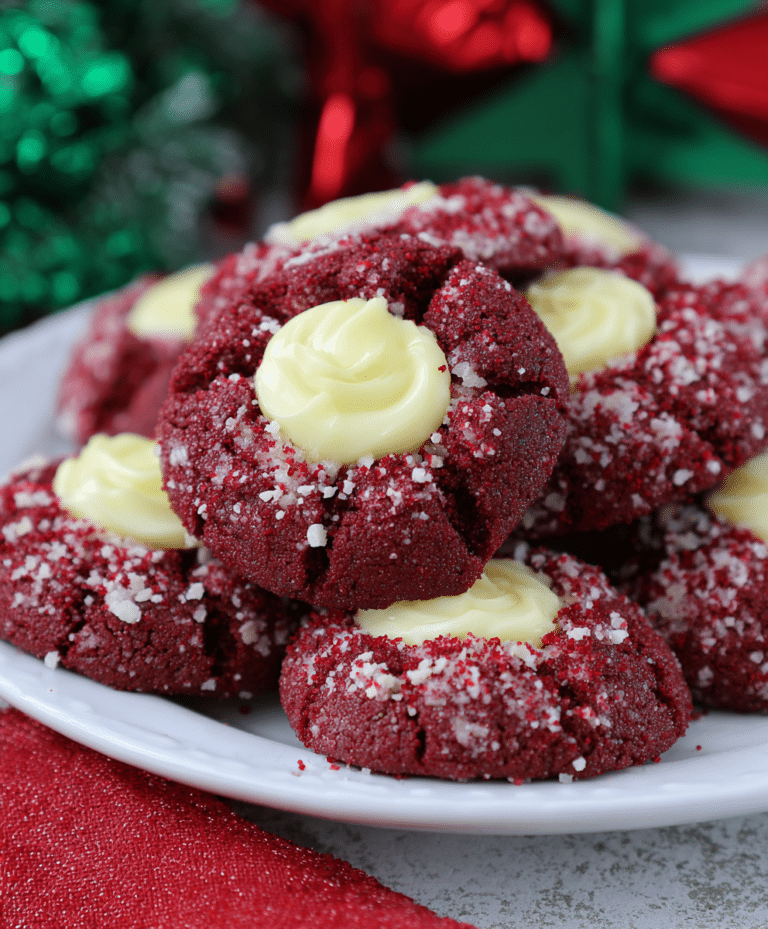
Red Velvet Cream Cheese Thumbprint Cookies
These soft, buttery red velvet thumbprint cookies are filled with creamy cheesecake and perfect for festive celebrations like Christmas or Valentine’s Day. Easy to make and impressive in taste and appearance.
- Total Time: 35 minutes
- Yield: 24 cookies 1x
Ingredients
Cookies:
- 1 cup butter, softened
- ½ cup brown sugar, packed
- 1 large egg yolk
- 1 tsp vanilla extract
- 2 cups all-purpose flour
- 4 tsp red food coloring
- 2 tsp cocoa powder
- ½ cup granulated sugar or sanding sugar (for rolling)
Cream Cheese Filling:
- 4 oz cream cheese, softened
- 1 large egg yolk
- ¼ cup granulated sugar
- ⅛ tsp salt
- ¼ tsp vanilla extract
Instructions
- Preheat oven to 350°F (175°C) and line two baking sheets with parchment paper.
- Cream butter and brown sugar until light and fluffy.
- Mix in egg yolk and vanilla extract.
- Whisk flour and cocoa powder, gradually add to wet ingredients.
- Add red food coloring and mix until even.
- Roll dough into 1-inch balls, coat in sugar, place 2 inches apart, and make indentation in center.
- Beat cream cheese, egg yolk, sugar, salt, and vanilla for filling.
- Fill cookie centers with cream cheese mixture and bake 12-14 minutes until edges are set.
- Cool on baking sheets for a few minutes, then transfer to wire rack.
Notes
- If dough is too soft, refrigerate 10-15 minutes before rolling.
- Use gel food coloring for vibrant red hue.
- Cookies can be frozen for up to 2 months; thaw at room temperature before serving.
- Prep Time: 20 minutes
- Cook Time: 15 minutes
- Category: Dessert
- Method: Baking
- Cuisine: American