There are few things more satisfying than a dessert that looks and tastes like it came from a bakery—yet takes less than 10 minutes to put together. These Two-Ingredient Lemon Bars are the ultimate example of simple meets spectacular. With only a box of cake mix and a can of lemon pie filling, you’ll have a pan of golden, tangy, sweet bars that melt in your mouth. No eggs, no oil, no complicated steps—just pure lemony sunshine in every bite.
This recipe is perfect for busy days, last-minute guests, or when that citrus craving hits hard. It’s also a wonderful introduction to baking for beginners, since the steps are straightforward and nearly foolproof. Whether you’re hosting a spring brunch, need a quick dessert for a potluck, or simply want something sweet and refreshing after dinner, these bars never disappoint.
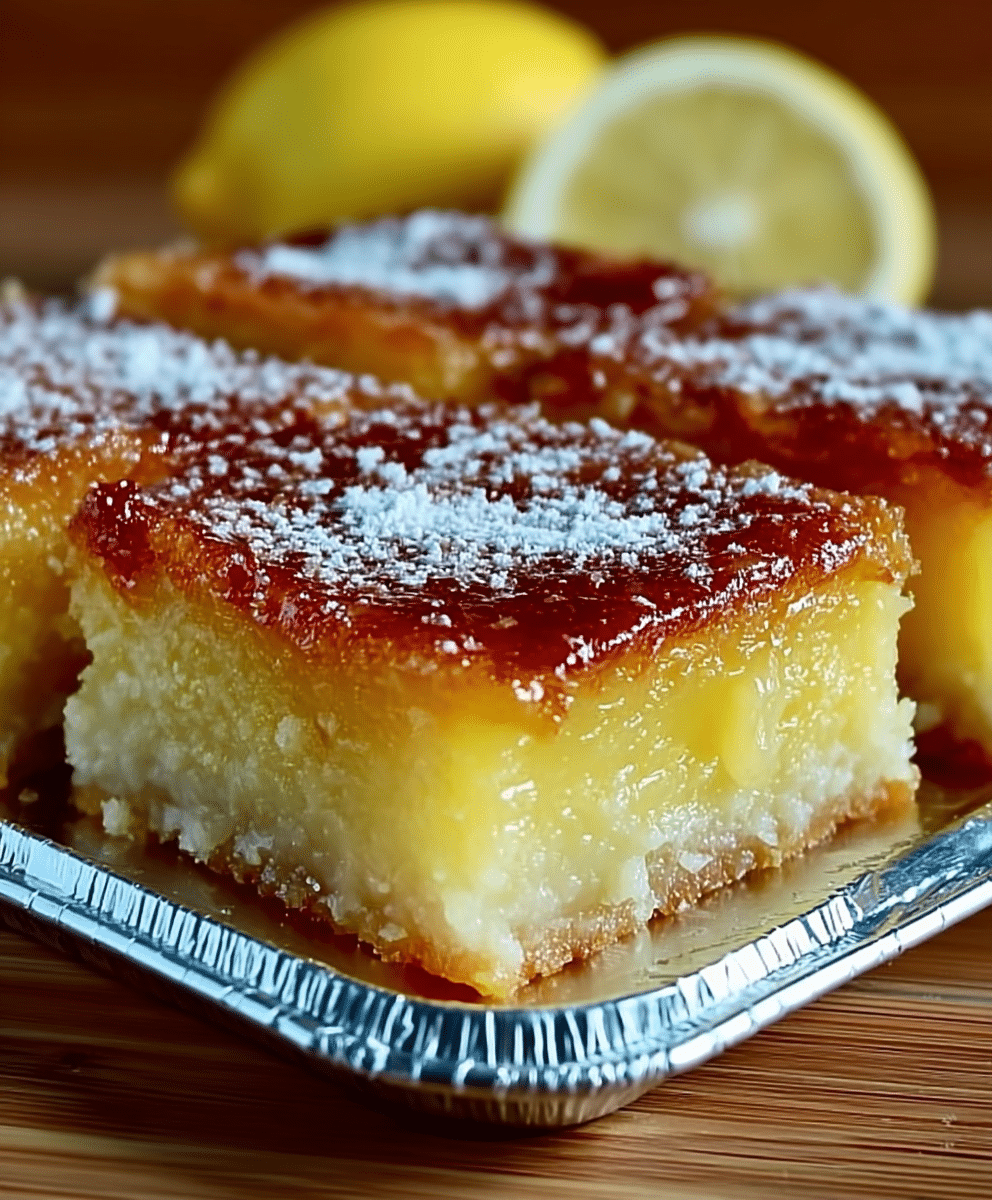
What makes these lemon bars stand out is how effortlessly they deliver flavor. The combination of fluffy cake mix and creamy lemon pie filling creates a texture that’s both moist and slightly chewy, with the bright citrus tang that wakes up your taste buds. The best part? You don’t even need frosting—the lemon filling does all the work.
Why You’ll Love This Recipe
- Only Two Ingredients – No extra eggs, oil, or butter required. It’s as simple as mixing and baking.
- Quick and Fuss-Free – From mixing bowl to oven in under 10 minutes.
- Perfectly Tangy and Sweet – Balanced flavor that’s bright without being overwhelming.
- Soft and Moist Texture – A cross between a lemon cake and a chewy bar, perfect for slicing.
- Crowd-Friendly – Makes a full 9×13-inch pan—great for parties, gatherings, or sharing.
- Adaptable and Customizable – Add zest, glaze, or powdered sugar to make it your own.
Ingredients Breakdown
Servings: 12 bars
Course: Dessert
Cuisine: American
Ingredients
- 1 box Angel Food Cake Mix or yellow cake mix
- 1 can (15 oz) Lemon Pie Filling
That’s truly all you need. The cake mix provides structure, sweetness, and that soft, spongy base, while the lemon pie filling adds flavor, moisture, and that irresistible tang.
If you want to elevate it slightly, consider optional touches like:
- 1 teaspoon lemon zest – for a brighter citrus note.
- Powdered sugar – to dust on top once cooled for a bakery-style finish.
Tools & Equipment Needed
You’ll only need a few basic kitchen tools for this recipe:
- Large Mixing Bowl – for combining the cake mix and lemon filling.
- Spatula or Spoon – to stir and spread the batter evenly.
- 9×13-inch Baking Dish – greased to prevent sticking.
- Measuring Spoon (optional) – if adding zest or vanilla.
- Cooling Rack – to allow the bars to cool completely before slicing.
- Fine Mesh Sieve (optional) – for dusting with powdered sugar.
Step-by-Step Instructions
Follow these steps for guaranteed success:
1. Preheat the Oven
Set your oven to 350°F (175°C). While it preheats, lightly grease your 9×13-inch baking dish with butter, oil, or non-stick spray. This step ensures your bars release easily after baking.
2. Combine the Ingredients
In a large mixing bowl, add the cake mix and the entire can of lemon pie filling. There’s no need for eggs, oil, or water—the moisture from the pie filling provides everything the cake mix needs.
Use a spatula or spoon to stir until the ingredients are just combined. The mixture will be thick and slightly gooey. Resist the temptation to overmix; a few small lumps are fine.
3. Spread the Batter
Pour the batter into your prepared baking dish. Use your spatula to spread it evenly across the pan. The batter will not pour like traditional cake batter—it’s thicker, almost like cookie dough—but it spreads easily.
4. Bake
Place the pan on the center rack of your preheated oven and bake for 25–30 minutes, or until the top is golden and the center is set. You’ll notice the surface becomes lightly browned, with a soft spring when touched.
5. Cool Completely
Remove the pan from the oven and set it on a cooling rack. Let the lemon bars cool completely in the pan. This step is important because they continue to firm up as they cool, making them easier to slice cleanly.
6. Slice and Serve
Once cooled, dust the top with powdered sugar if desired. Cut into squares or rectangles using a sharp knife, and serve at room temperature.
Each bite is moist, tangy, and perfectly balanced between sweet and zesty.
Tips & Variations
Even though this recipe shines with its simplicity, a few creative tweaks can make it your own.
Flavor Enhancements
- Add Fresh Lemon Zest: Stir in a teaspoon of lemon zest to intensify the citrus aroma.
- Drizzle with Lemon Glaze: Mix powdered sugar and lemon juice to create a light glaze.
- Top with Coconut Flakes: Sprinkle shredded coconut over the batter before baking for a tropical twist.
Dietary Adjustments
- Vegan Option: Use a vegan-friendly cake mix and a plant-based lemon pie filling.
- Gluten-Free Option: Substitute a gluten-free yellow or white cake mix.
- Lower Sugar: Opt for sugar-free pie filling and light cake mix if available.
Other Cake Mix Options
While angel food and yellow cake mixes are the most popular, you can experiment:
- White cake mix for a neutral base.
- Lemon cake mix for double lemon intensity.
- Vanilla cake mix for a milder, creamier flavor.
Flavor Profile & Pairings
These lemon bars are everything you want from a citrus dessert:
- Flavor: Bright lemon tang balanced by cake-like sweetness.
- Texture: Soft, moist, and chewy with a slightly crisp top.
- Aroma: Freshly baked lemon with a touch of vanilla warmth from the cake mix.
Perfect Pairings (No Drinks Included)
Serve alongside:
- Fresh berries (raspberries, blueberries, or strawberries).
- Whipped cream or vanilla yogurt for a creamy contrast.
- Shortbread cookies for a crunchy side pairing.
Nutritional Overview
Each serving (1 bar out of 12) contains approximately:
- Calories: 150 kcal
- Carbohydrates: 25g
- Protein: 2g
- Fat: 5g
- Saturated Fat: 1g
- Sodium: 200mg
- Potassium: 50mg
- Sugar: 10g
These bars are relatively light for a dessert, making them a great treat for when you want something sweet without going overboard.
Make-Ahead & Meal Prep Tips
This dessert is ideal for preparing ahead of time since the bars actually taste even better after a few hours, once the flavors meld and the texture sets.
To Make Ahead:
- Bake and cool completely.
- Cover tightly with plastic wrap or foil.
- Store at room temperature for up to 3 days.
Refrigerating:
For longer storage, refrigerate the bars for up to 5 days. The lemon flavor remains vibrant, and the texture stays moist.
Reheating:
If you prefer them slightly warm, microwave individual slices for about 10 seconds.
FAQs
1. Can I use homemade lemon curd instead of pie filling?
Yes! Just ensure it’s thick enough to mimic the texture of canned lemon pie filling. You’ll need about 1½ cups.
2. What’s the difference between using angel food cake mix and yellow cake mix?
Angel food mix yields lighter, fluffier bars, while yellow cake mix gives a denser, richer texture. Both are delicious—it depends on your preference.
3. Can I freeze lemon bars?
Absolutely. Freeze cooled, sliced bars in an airtight container for up to 2 months. Thaw at room temperature before serving.
4. How do I prevent overbaking?
Check the bars at the 25-minute mark. They’re done when the top is lightly golden and the center no longer jiggles.
5. Do these bars need to be refrigerated?
Not necessarily. They can stay at room temperature for up to 3 days, but refrigeration will extend their freshness.
6. Can I double the recipe?
Yes—simply double the ingredients and use two baking pans. Baking time remains the same.
Cooking Timeline (At a Glance)
| Step | Task | Time |
|---|---|---|
| Prep | Preheat oven & grease pan | 5 minutes |
| Mix | Combine cake mix & lemon filling | 5 minutes |
| Bake | In 350°F oven | 25–30 minutes |
| Cool | Let cool completely | 30 minutes |
| Total | Ready to serve | ~1 hour 10 minutes |
Serving Suggestions
Presentation matters, even for simple recipes. Try these serving ideas:
- Powdered Sugar Dusting: Classic and elegant.
- Lemon Glaze Drizzle: Combine ½ cup powdered sugar with 1 tablespoon lemon juice.
- Layered Dessert: Stack with whipped cream and fresh berries in small parfait cups.
- Mini Bars: Cut into bite-sized squares for parties or bake in muffin liners for individual portions.
Recipe Variations
1. Lemon Blueberry Bars
Add 1 cup of fresh or frozen blueberries to the batter before baking. The blueberries burst while baking, adding juicy sweetness to every bite.
2. Strawberry Lemon Bars
Swirl ¼ cup strawberry jam into the batter before baking for a beautiful marbled effect.
3. Lemon Coconut Bars
Stir ½ cup shredded coconut into the mixture or sprinkle on top before baking for added texture.
4. Glazed Lemon Loaf
Bake the mixture in a loaf pan instead of a dish, slice, and drizzle with a lemon glaze for a quick cake-style variation.
Ingredient Spotlight
Lemon Pie Filling
Lemon pie filling is the heart of this recipe—it gives the bars their tang, moisture, and distinctive flavor. When shopping, look for a high-quality brand made with real lemon juice for the best results.
Storage Tip: Once opened, leftover pie filling can be refrigerated in a sealed container for up to 5 days.
Cake Mix
The secret to this recipe’s simplicity! Angel food mix creates a lighter bar, while yellow cake mix offers a more classic, buttery flavor.
Pro Tip: Sift the cake mix before adding the filling to remove lumps and achieve an even texture.
Pro Cooking Tips
- Do not overmix. The batter should be just combined for the best texture.
- Cool completely before slicing. Warm bars may crumble or stick.
- Use parchment paper for easy removal. Lining your pan allows you to lift the bars out cleanly.
- Add lemon zest for brightness. Fresh zest enhances flavor without extra tartness.
- Check doneness early. Every oven differs—start checking at 25 minutes.
Storage & Freezing Guide
Storing
- Room Temperature: Up to 3 days in an airtight container.
- Refrigerator: Up to 5 days, covered.
Freezing
- How to Freeze: Slice bars, separate layers with parchment, and seal in an airtight container.
- How to Thaw: Leave at room temperature for 1–2 hours before serving.
- Avoid Freezing Before Baking: The batter’s texture doesn’t hold well uncooked.
Nutrition Estimate (Per Serving)
| Nutrient | Amount |
|---|---|
| Calories | 150 kcal |
| Carbohydrates | 25 g |
| Protein | 2 g |
| Fat | 5 g |
| Saturated Fat | 1 g |
| Sodium | 200 mg |
| Potassium | 50 mg |
| Sugar | 10 g |
| Fiber | 0 g |
Dietary Notes:
- Vegetarian-friendly
- Nut-free
- Easily adaptable to gluten-free or vegan with alternative mixes
Expanded Conclusion
These Two-Ingredient Lemon Bars are proof that sometimes the simplest recipes are the most satisfying. With just a box of cake mix and a can of lemon pie filling, you get a soft, tangy, golden treat that’s as easy as it is delicious. They’re perfect for any season, but especially welcome in spring and summer when citrus desserts shine.
Whether you’re baking for your family, preparing a quick dessert for company, or simply craving something bright and homemade, these bars deliver every time. They come together effortlessly, yet look and taste like you spent hours in the kitchen.
If you love quick desserts with big flavor, bookmark this recipe—it’s one you’ll reach for again and again. Share a slice of sunshine with friends, and watch these lemon bars disappear faster than you can say “two ingredients.”
Print
Two-Ingredient Lemon Bars
These Two-Ingredient Lemon Bars are tangy, sweet, and unbelievably easy to make with just a box of cake mix and a can of lemon pie filling.
- Total Time: 40 minutes
- Yield: 12 servings 1x
Ingredients
- 1 box Angel food or yellow cake mix
- 1 can (15 oz) Lemon pie filling
Instructions
- Preheat your oven to 350°F (175°C) and grease a 9×13-inch baking dish to prevent sticking.
- In a large mixing bowl, pour in the cake mix and add the entire can of lemon pie filling. No eggs, oil, or water needed!
- Stir everything together until just combined. The mixture will be thick and gooey—don’t worry, that’s exactly how it should be.
- Pour the batter into your prepared dish and use a spatula to spread it evenly.
- Bake for 25–30 minutes or until the top is golden and the bars are set in the center.
- Remove from the oven and allow to cool completely in the pan. Once cooled, dust with powdered sugar if desired.
- Slice into bars, serve, and enjoy the zesty goodness.
Notes
- For best results, use a good quality cake mix and genuine lemon pie filling.
- Consider adding a teaspoon of fresh lemon zest for extra flavor.
- Prep Time: 10 minutes
- Cook Time: 30 minutes
- Category: Dessert
- Method: Baked
- Cuisine: American
- Diet: Vegetarian
Nutrition
- Serving Size: 1 bar
- Calories: 150 kcal
- Sugar: 10 g
- Sodium: 200 mg
- Fat: 5 g
- Saturated Fat: 1 g
- Unsaturated Fat: 3 g
- Trans Fat: 0 g
- Carbohydrates: 25 g
- Fiber: 0 g
- Protein: 2 g
- Cholesterol: 0 mg